 Pin it
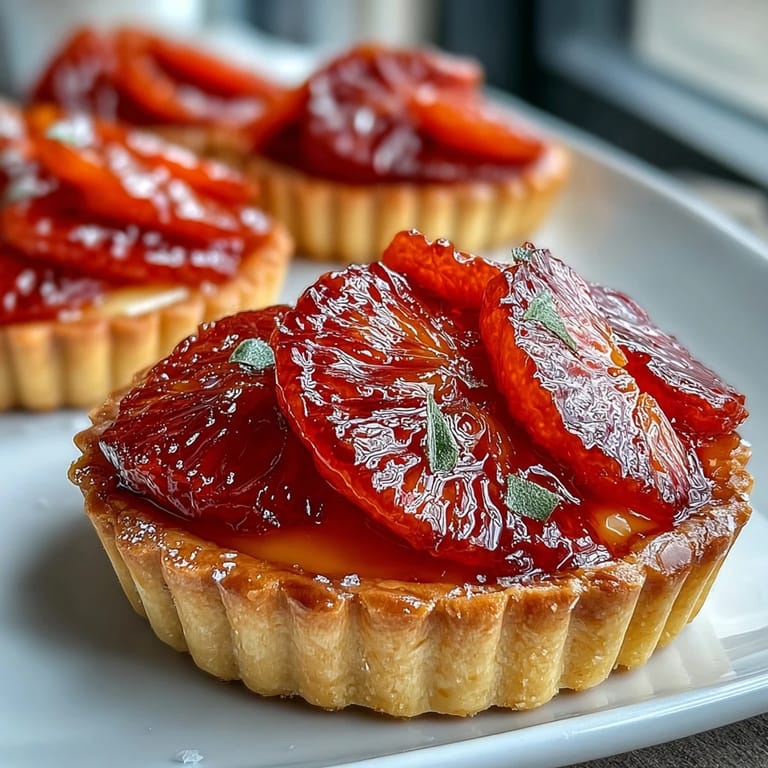
 My sister called me in a panic one April afternoon, asking if I could bring dessert to her dinner party that evening. I was mid-laundry, but something about blood oranges at the market that morning had already planted an idea in my head. Three hours later, I was pulling these tarts from the fridge, their jewel-toned fruit catching the light like stained glass, and I realized I'd stumbled onto something that felt both impressive and somehow effortless. That's when blood orange tarts became my secret weapon.
I'll never forget my neighbor leaning against my kitchen counter, watching me brush that honey glaze over the orange slices, and saying "you're basically a pastry chef now." I laughed because my hands were still shaky from the custard stage, but honestly, that moment shifted how I thought about what's possible in a home kitchen. These tarts made me believe I could pull off elegant desserts without pretending to be something I'm not.
Ingredients
- All-purpose flour (1 1/4 cups): The foundation of a tender, workable dough that doesn't require special techniques or fancy equipment to turn into something beautiful.
- Powdered sugar (1/4 cup): This sweetens the dough while adding tender texture, unlike granulated sugar which can make pastry tough and grainy.
- Unsalted butter, cold and cubed (1/2 cup): Cold butter is non-negotiable here; it creates the flaky layers that make people close their eyes when they bite into these tarts.
- Egg yolk (1 large): Binds everything together with richness and helps achieve that golden-brown finish that makes tarts look professional.
- Ice water (1-2 tbsp): Added a tablespoon at a time, just until the dough holds together; too much water and you'll end up with tough, dense shells.
- Salt (pinch): Brightens the buttery flavor of the crust in a way you won't consciously taste but absolutely will miss if it's gone.
- Whole milk (1 1/4 cups): The creamy base for custard that's silky without being heavy or eggy-tasting.
- Granulated sugar (1/3 cup): Sweetens the custard to balance the tart citrus topping with gentle elegance.
- Egg yolks (3 large): Create that luxurious, coat-the-back-of-a-spoon custard texture that makes this dessert feel fancy.
- Cornstarch (2 tbsp): The secret ingredient that prevents the custard from breaking and gives it a stable, velvety texture.
- Pure vanilla extract (1 tsp): Buy the real stuff; it makes a difference that's subtle but unmissable in a custard this simple.
- Unsalted butter (1 tbsp): Stirred in at the end, this adds richness and shine to the finished custard.
- Blood oranges (3-4): The stunning finale that transforms these tarts into something restaurant-worthy; if blood oranges aren't in season, regular oranges work but the magic is slightly diminished.
- Honey (1 tbsp, optional): Warmed with water to create a glossy finish that catches light and makes these tarts shine on the plate.
Tired of Takeout? 🥡
Get 10 meals you can make faster than delivery arrives. Seriously.
One email. No spam. Unsubscribe anytime.
Instructions
- Pulse together the dry ingredients:
- In your food processor, combine flour, powdered sugar, and salt, pulsing just until everything is evenly mixed. This takes maybe ten seconds; don't overthink it.
- Cut in the cold butter:
- Add your cubed butter and pulse in short bursts until the mixture looks like coarse breadcrumbs with some pea-sized pieces still visible. You're aiming for texture, not smoothness.
- Bring the dough together:
- Add the egg yolk and pulse, then sprinkle in ice water a tablespoon at a time, pulsing after each addition until the dough just comes together when you squeeze a handful. It should feel slightly crumbly but hold when pressed.
- Chill the dough:
- Shape it into a disk, wrap it tightly in plastic wrap, and refrigerate for at least an hour (or up to two days if you're planning ahead). This waiting period is when the gluten relaxes and the butter firms up, making rolling easier.
- Roll and fit the tart shells:
- On a lightly floured surface, roll the dough to about 1/8-inch thickness. Cut circles slightly larger than your tart pans and press them in gently, letting the sides come up naturally; trim any ragged edges.
- Pre-chill the shells:
- Refrigerate the fitted tart shells for 20 minutes while you preheat the oven to 350°F. This second chill prevents them from shrinking during baking.
- Blind bake the shells:
- Line each shell with parchment and fill with pie weights (or dried beans), then bake for 15 minutes. Remove the weights and parchment, bake another 5 minutes until the bottoms are pale golden, then cool completely on a wire rack.
- Heat the milk gently:
- Pour your milk into a saucepan and heat it slowly until it's steaming but not boiling; you'll see small bubbles forming around the edges. This is important because cold milk added to eggs can create scrambled texture.
- Whisk the egg mixture:
- In a separate bowl, whisk together egg yolks, sugar, and cornstarch until the mixture is pale and falls from the whisk in ribbons. The cornstarch suspends throughout the custard, preventing curdling.
- Temper the eggs slowly:
- Pour the hot milk into the egg mixture very gradually while whisking constantly, incorporating it little by little. This prevents the eggs from scrambling by raising their temperature gradually rather than shocking them.
- Cook the custard to thickness:
- Return the entire mixture to the saucepan and cook over medium heat, whisking constantly, for about 2 to 3 minutes until it bubbles gently and coats the back of a spoon. Don't walk away; this happens faster than you'd expect.
- Finish the custard:
- Remove from heat and stir in the vanilla extract and butter until the butter melts and everything is silky. The residual heat does the final cooking.
- Cool the custard properly:
- Transfer the custard to a bowl and press plastic wrap directly onto the surface to prevent a skin from forming. Let it cool to room temperature, then refrigerate for at least an hour until it's chilled and set.
- Assemble with confidence:
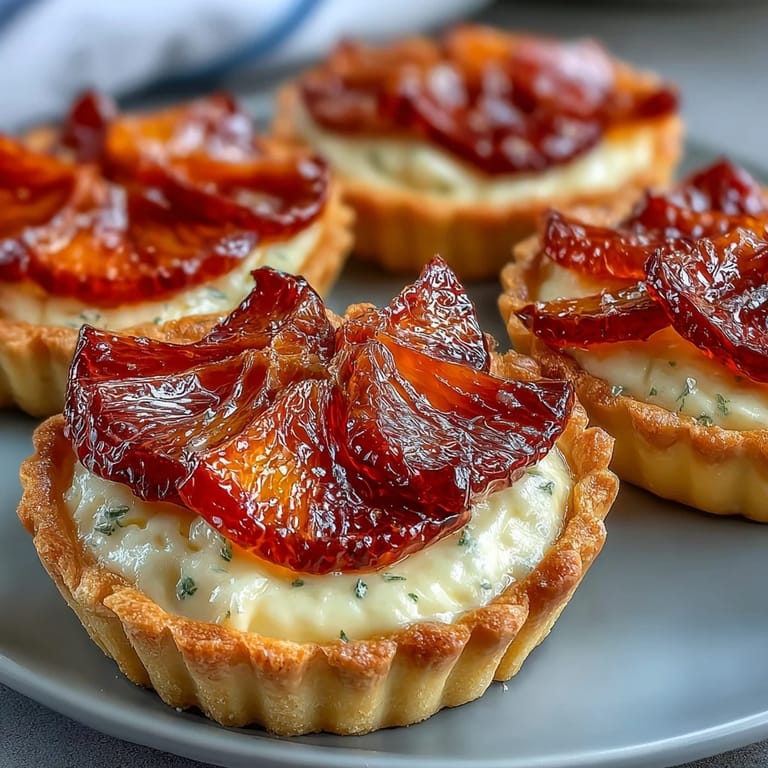
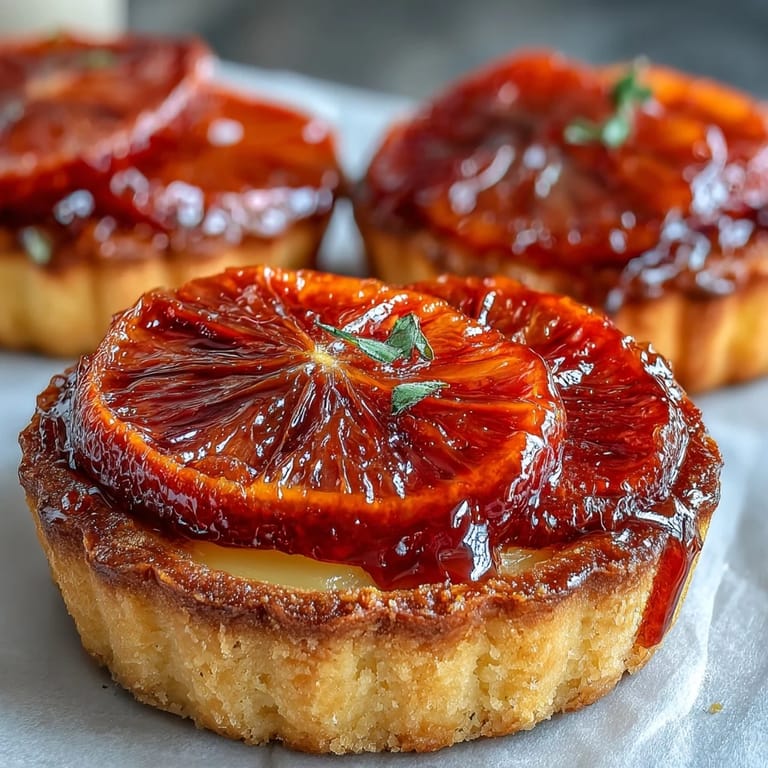
- Spoon the chilled custard into your cooled tart shells, dividing it evenly among them. Arrange blood orange slices on top in a slightly overlapping pattern that looks intentional.
- Add a glossy finish (optional but recommended):
- Warm a tablespoon of honey with a teaspoon of water, then gently brush it over the orange slices with a pastry brush. This gives the tarts a jewel-like shine and helps the fruit stay moist.
- Chill until service:
- Return the assembled tarts to the refrigerator until you're ready to serve. They can sit there for several hours, though the shells stay crispest if served within a few hours of assembly.
 Pin it
 My father, who normally skips dessert, actually sat down at the table when these came out. He ate one slowly, not talking, just experiencing it, and I realized that the combination of textures and flavors had created something that transcended being just a pretty thing to eat. That's when I understood these tarts were worth the focus and care they demand.
Why Timing Matters Here
The beauty of this recipe is that it's designed for people with real lives, not just dedicated bakers. You can make the shells and custard a full day ahead, keeping them separately in the fridge; the custard in a covered bowl and the cooled shells in an airtight container. The morning you plan to serve them, you just need to assemble and chill for an hour, which is honestly the easiest part. This strategic timing is what makes elegant desserts feel accessible instead of stressful.
The Blood Orange Moment
There's something almost meditative about peeling and slicing blood oranges for this dessert. The deep crimson color is nature doing the decorating for you, which feels like a gift. I've learned that cutting them into thin, even rounds takes maybe two extra minutes compared to irregular slices, but the visual difference is everything; these tarts are as much about what they look like as what they taste like.
Substitutions and Variations That Work
While blood oranges are the showstopper, I've successfully made these with regular oranges, tangerines, and even grapefruit when I'm feeling adventurous. For a citrusy custard variation that echoes the topping, add a teaspoon of finely grated orange zest to the warm custard before it cools. Some nights I've skipped the honey glaze entirely and the tarts are still stunning; the glaze just adds a final layer of polish if you want to take them from homemade to restaurant-level presentation.
- If you can't find blood oranges, any citrus with interesting color will create the visual impact this dessert depends on.
- Make the recipe gluten-free by using a quality gluten-free flour blend instead of all-purpose flour in the tart shells.
- These pair beautifully with sparkling rosé, dessert wine, or even strong coffee if your guests prefer non-alcoholic pairings.
 Pin it
 These tarts have taught me that some of the most impressive things we make in our kitchens are actually within reach if we're willing to break them into manageable steps and take our time. Every time I make them, I feel a little braver about trying other recipes that seem intimidating.
Recipe FAQs
- → Can I make these tarts ahead of time?
Yes, you can prepare the tart shells and custard a day in advance. Store shells at room temperature and custard covered in the refrigerator. Assemble with blood oranges 2-4 hours before serving for optimal texture and presentation.
- → What can I substitute for blood oranges?
Regular oranges, cara cara oranges, or even grapefruit work beautifully. While you'll lose the dramatic red color, the flavor and texture will still be excellent. Choose fruit that's sweet and not overly tart.
- → How do I prevent the tart shells from shrinking?
Ensure the dough is well-chilled before rolling and again after pressing into pans. Don't stretch the dough when fitting it into the tart pans, and use pie weights during blind baking to maintain the shape.
- → Can I use a different type of custard?
Absolutely. Pastry cream, lemon curd, or even a mascarpone cream would work wonderfully. Just ensure whatever filling you choose is thick enough to hold its shape when the tarts are sliced.
- → How long will these tarts keep?
Assembled tarts are best within 24 hours. The shells may soften over time from the custard moisture. Store refrigerated and bring to cool room temperature 15 minutes before serving for best flavor.
- → Do I need special tart pans?
Individual 4-inch tart pans with removable bottoms work best for clean presentation. Alternatively, you can use a 9-inch tart pan for one large tart, adjusting baking time by a few minutes as needed.