 Pin it
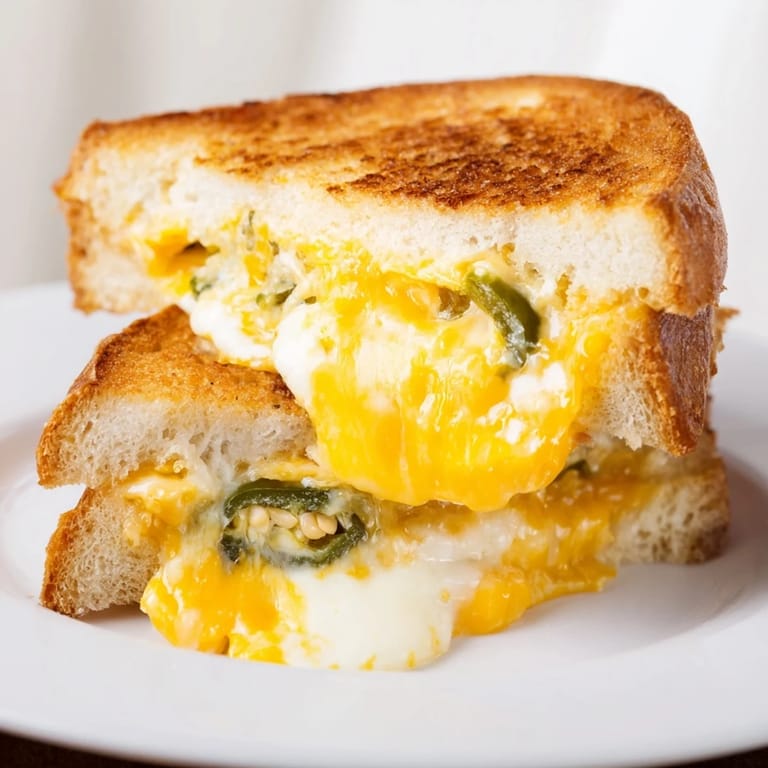
 My youngest daughter once declared she hated jalapeños until she tried one of these sandwiches cooling on the counter. She'd been skeptical about the green flecks peeking through the melted cheese, but one bite turned her into a believer. Now she asks for them every Saturday, and I've learned to keep cream cheese and fresh peppers stocked at all times. It's funny how a simple grilled cheese can become a household ritual.
I started making these on rainy weeknights when nobody could agree on dinner. The smell of butter hitting the hot skillet and that first sizzle always brought everyone into the kitchen. My husband would hover near the stove, waiting to steal the crispy edge bits that stuck to the pan. Those quiet moments, just flipping sandwiches while rain drummed on the windows, became some of my favorite memories from that winter.
Ingredients
- Cream cheese (4 oz, softened): This is what makes the filling creamy instead of stringy, and softening it fully means no lumps when you mix everything together.
- Sharp cheddar cheese (1 cup, shredded): Sharp cheddar gives you that tangy bite that balances the richness, and shredding your own melts better than pre-shredded.
- Unsalted butter (2 tbsp, softened): Softened butter spreads evenly without tearing the bread, and unsalted lets you control the salt level in the filling.
- Fresh jalapeños (2, seeded and finely chopped): Seeding them keeps the heat manageable while the pepper flavor shines through, and finely chopping ensures every bite has a bit of spice.
- Sturdy white or sourdough bread (4 slices): Sturdy bread holds up to the creamy filling without getting soggy, and sourdough adds a subtle tang that complements the cheese.
- Cooked bacon bits (2 tbsp, optional): Bacon adds a smoky crunch that makes these feel indulgent, but they're just as satisfying without it for a simpler vegetarian version.
Tired of Takeout? 🥡
Get 10 meals you can make faster than delivery arrives. Seriously.
One email. No spam. Unsubscribe anytime.
Instructions
- Mix the filling:
- In a medium bowl, combine the softened cream cheese, shredded cheddar, and chopped jalapeños, stirring until everything looks evenly blended and creamy. If you're adding bacon bits, fold them in now so they distribute throughout the mixture.
- Assemble the sandwiches:
- Spread half the cheese mixture over two slices of bread, going all the way to the edges so every bite has filling. Top each with another bread slice and press gently to help everything stick together.
- Butter the outsides:
- Spread softened butter on the outside of each sandwich, covering both the top and bottom slices completely. This ensures that golden, crispy crust we're after.
- Heat the skillet:
- Place a nonstick skillet or griddle over medium heat and let it warm for about a minute. You want it hot enough to sizzle when the butter hits but not so hot that the bread burns before the cheese melts.
- Grill until golden:
- Set the sandwiches in the skillet and cook for 3 to 4 minutes per side, pressing down gently with a spatula to help the cheese melt evenly. Flip when the bottom turns a deep golden brown and you can smell the butter toasting.
- Cool and serve:
- Remove the sandwiches from the heat and let them rest for a minute or two so the filling sets slightly and doesn't ooze everywhere when you cut in. Slice diagonally and serve while still warm and gooey.
 Pin it
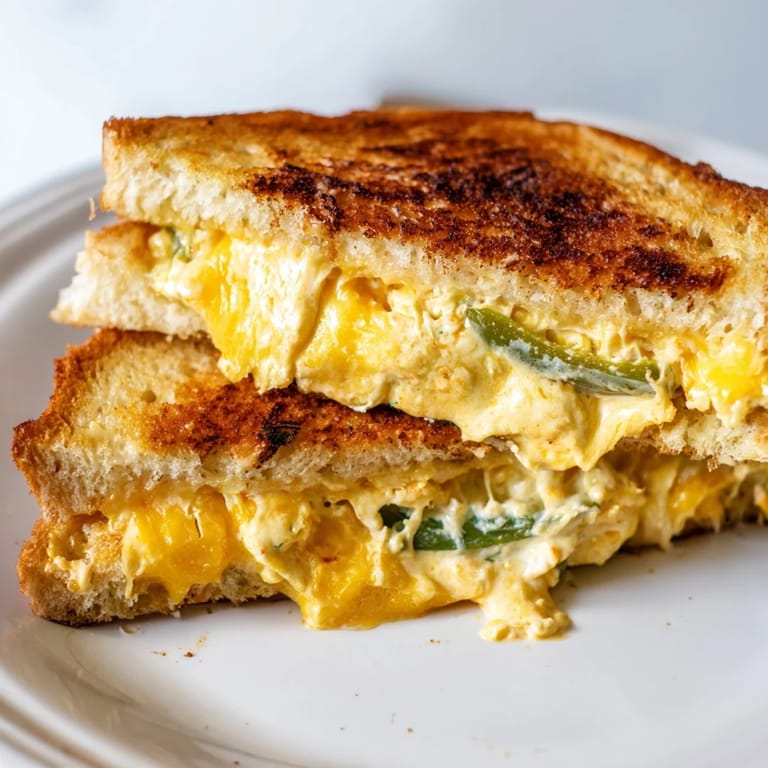
 The first time I served these at a casual get-together, a friend who claimed to hate spicy food ended up eating three halves. She kept saying she couldn't believe how the cream cheese tamed the jalapeños just enough to make them approachable. That night, I realized this wasn't just a quick dinner fix but something that could bring people together over a shared plate and a little bit of heat.
Choosing Your Bread
I've tried this recipe with everything from soft sandwich bread to thick-cut sourdough, and the sturdier options always win. Thin or fluffy bread gets soggy from the creamy filling and tears when you flip it. Sourdough adds a slight tang that plays beautifully with the sharpness of the cheddar, while a good white bread gives you that nostalgic grilled cheese texture with enough structure to hold everything in place.
Adjusting the Heat Level
Removing all the seeds and membranes from the jalapeños gives you mild pepper flavor without much burn, which is perfect if you're cooking for kids or anyone sensitive to spice. If you want more kick, leave in a few seeds or add a pinch of crushed red pepper to the filling. I once left the seeds in by accident and ended up with a sandwich that made my eyes water, so now I taste a tiny bit of the raw pepper first to gauge its heat before committing.
Serving Suggestions and Pairings
These sandwiches are rich and satisfying on their own, but pairing them with something acidic or fresh balances the creaminess perfectly. A simple arugula salad with lemon vinaigrette or a bowl of tomato soup turns this into a full meal without much extra effort. I also love serving them with pickles or a handful of kettle chips for crunch, and they're excellent cut into smaller squares as a party appetizer.
- Serve with tomato soup for a cozy, nostalgic combo that never gets old.
- Add a side salad with citrus dressing to cut through the richness and add freshness.
- Slice into quarters and serve as finger food at game day gatherings or casual parties.
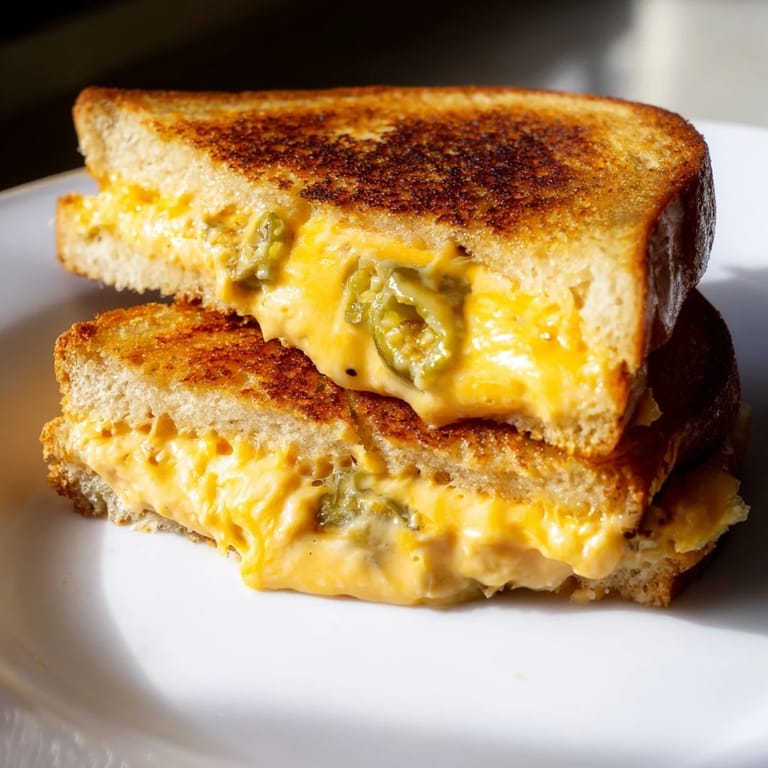 Pin it
 This sandwich has become my go-to when I want something comforting but exciting, a little bit indulgent without being complicated. I hope it finds a place in your kitchen the way it has in mine.
Recipe FAQs
- → How do I control the spice level?
For milder heat, remove all jalapeño seeds before chopping. For extra heat, keep some seeds in or add a pinch of chili flakes to the cheese mixture. You can also use fewer jalapeños or substitute with milder peppers.
- → Can I make this ahead of time?
Yes, prepare the cheese and jalapeño filling up to 24 hours ahead and store it in an airtight container in the refrigerator. Assemble and grill when ready. The sandwiches are best served immediately after grilling while the cheese is warm and melted.
- → What bread works best?
Sturdy white bread, sourdough, or country bread work well as they hold up to grilling without falling apart. Avoid thin, delicate breads. For a heartier option, try whole wheat or focaccia for added texture and flavor.
- → Can I use different cheeses?
Absolutely. Pepper jack or Monterey Jack offer excellent alternatives with complementary heat. Gruyère adds a sophisticated touch, while mozzarella creates a creamier texture. Any melting cheese works—experiment to find your favorite combination.
- → How do I prevent the bread from burning?
Keep your skillet or griddle at medium heat rather than high. This allows the bread to brown gradually while the cheese melts through. Pressing gently with a spatula helps, and watching carefully during the last minute ensures even browning.
- → Is this vegetarian?
Yes, the base is vegetarian with cream cheese, cheddar, jalapeños, butter, and bread. The optional bacon bits can be omitted or replaced with plant-based alternatives. Always verify your bread and cheese labels for dietary preferences.