 Pin it
 My nephew called them "breakfast cereal that's actually pancakes," and honestly, he nailed it. One Saturday morning, I was scrambling to make something special without the fuss, and it hit me—what if I made tiny pancakes and served them in a bowl with cold milk? The look on his face when he realized he could eat pancakes with a spoon like regular cereal was pure magic. It's become our weekend ritual, and now every kitchen visit starts with "Can we make pancake cereal?"
I'll never forget the first time I made a full batch for my book club—everyone showed up thinking it was a joke until they actually tried them. One friend went back for thirds and admitted she'd been eating sad boxed cereal for years when this was possible. That's when I realized this recipe wasn't just cute; it was genuinely delicious and kind of revolutionary for how simple it was.
Ingredients
- All-purpose flour (1 cup): This is your foundation—make sure it's fresh and not packed down when you measure it, or you'll end up with dense, heavy pancakes instead of fluffy clouds.
- Granulated sugar (2 tbsp): Just enough sweetness to make the batter taste right without making these overly sugary (you're adding syrup on top anyway).
- Baking powder and baking soda (1 tsp and 1/2 tsp): These two work together to give you that signature fluffy texture—don't skip the baking soda, it reacts with the buttermilk and makes all the difference.
- Salt (1/4 tsp): A small pinch that makes the flavors pop and keeps things from tasting flat.
- Buttermilk (3/4 cup): This is the secret weapon for tenderness and tang; if you don't have it, mix regular milk with lemon juice and let it sit for a minute.
- Egg (1 large): Binds everything together and adds richness that makes these taste homemade.
- Melted butter (2 tbsp): Cool it slightly before mixing so it doesn't scramble the egg, and it adds that buttery flavor that makes people ask for the recipe.
- Vanilla extract (1 tsp): A small touch that rounds out the flavor and makes these taste like something special, not just basic pancakes.
- Butter or oil for the pan: Use just enough to coat—too much and they'll be greasy, too little and they'll stick.
- Maple syrup and cold milk for serving: The milk is key here; it's what transforms these into "cereal" and creates that perfect contrast with warm pancakes.
Tired of Takeout? 🥡
Get 10 meals you can make faster than delivery arrives. Seriously.
One email. No spam. Unsubscribe anytime.
Instructions
- Mix the dry team:
- Whisk your flour, sugar, baking powder, baking soda, and salt in a large bowl until everything is evenly distributed and there are no lumps hiding in the flour. This step matters because uneven leavening means some pancakes will puff and others won't.
- Combine the wet ingredients:
- In another bowl, whisk together buttermilk, egg, cooled melted butter, and vanilla until the mixture looks smooth and slightly frothy. The buttermilk will make the egg a bit bubbly, which is exactly what you want.
- Bring it together gently:
- Pour the wet mixture into the dry ingredients and whisk just until you see no more streaks of flour—lumps are your friend here because overmixing makes pancakes tough. Stop as soon as you can't see dry flour; those little lumps will actually cook out to perfect fluffy bits.
- Load your dispensing tool:
- Transfer the batter to a squeeze bottle, piping bag, or just grab a teaspoon if you want to go old-school. A squeeze bottle gives you the most control and uniform sizes, which makes cooking easier and plating prettier.
- Heat and grease your cooking surface:
- Get your nonstick skillet or griddle to medium heat and give it a light coat of butter or oil. You'll know it's ready when a tiny drop of water sizzles gently—not aggressively—on the surface.
- Squeeze tiny pancake dots:
- Create small dots of batter about half an inch across, leaving space between each one so they can puff without merging. Think of them as little pancake confetti scattered across your pan.
- Watch for the bubble sign:
- After about 1 to 2 minutes, you'll see bubbles form on top and the edges will look slightly set and lighter in color. This is your cue that the bottom is golden and it's time to flip.
- Quick flip and finish:
- Use a thin spatula to gently flip each pancake and let the other side cook for just 30 to 60 seconds until it's golden brown. The second side always cooks faster because the pan is already hot.
- Keep the production line moving:
- Transfer finished pancakes to a plate and repeat with the remaining batter, greasing your pan lightly between batches. If you're feeling ambitious, you can keep finished pancakes warm in a 200°F oven while you finish the rest.
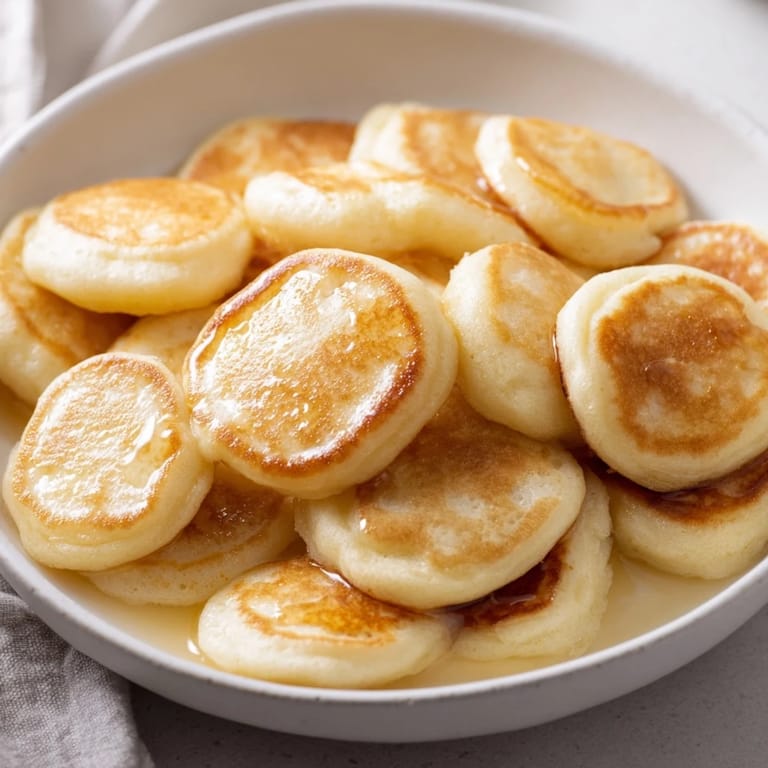
- Serve in bowls like cereal:
- Pile your warm mini pancakes into bowls, drizzle generously with maple syrup, and pour cold milk over them just before eating. The warm pancakes soften slightly in the milk while staying crispy on the edges, which is pure textural bliss.
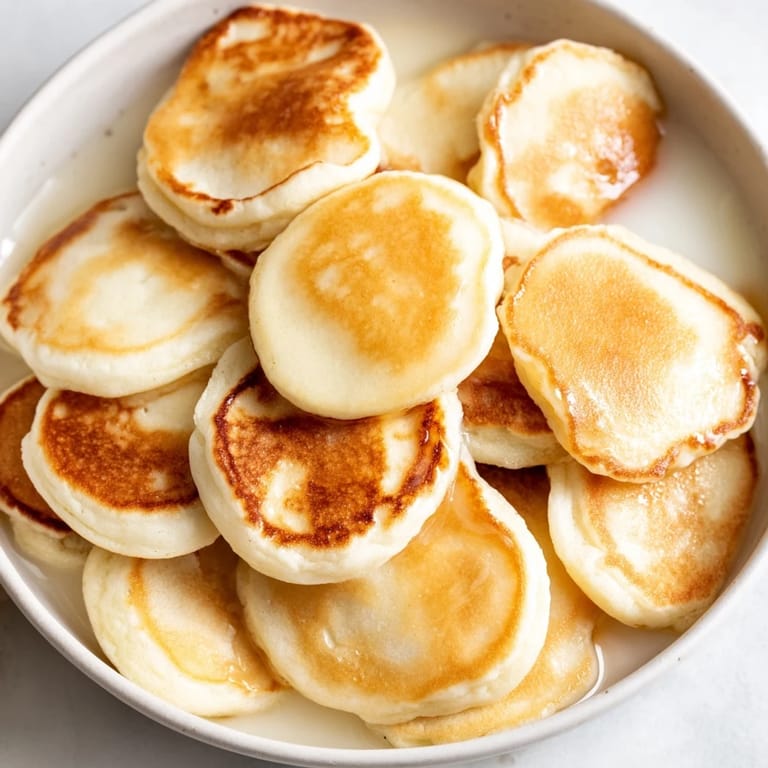 Pin it
 There's something almost ceremonial about pouring milk over pancakes in a cereal bowl—it transforms breakfast into something playful and a little bit nostalgic. My sister said it reminded her of being a kid again, except these actually taste amazing, and I think that's the whole heart of this recipe.
Why This Twist on Breakfast Works
Traditional pancakes are wonderful, but they require constant attention at the griddle and eating them before they cool down. These mini pancakes solve that problem by being small enough that they stay warm longer and fun enough that nobody minds waiting for a fresh batch. The cereal presentation also means everyone can eat at their own pace—no rushing to finish while the stack is still hot.
Making Them Your Own
This base recipe is flexible and forgiving, which makes it perfect for getting creative. I've added mini chocolate chips for my friend who loves sweet breakfasts, stirred in blueberries for someone who wanted fruit, and even tried a lemon zest version that tasted bright and summery. The squeeze bottle method means you can make shapes too—tiny pancake hearts, fun swirls, or whatever you're in the mood for.
Pro Tips & Last-Minute Thoughts
A few things I've learned along the way that make this recipe even easier to pull off.
- If you don't have a squeeze bottle, a small ice cream scoop works surprisingly well for creating consistent pancake sizes.
- Make the batter while your griddle preheats so you're not letting it sit around—fresh batter makes fluffier pancakes.
- Leftover mini pancakes actually keep in the fridge for a couple of days and reheat beautifully in a toaster oven, so don't hesitate to make a big batch.
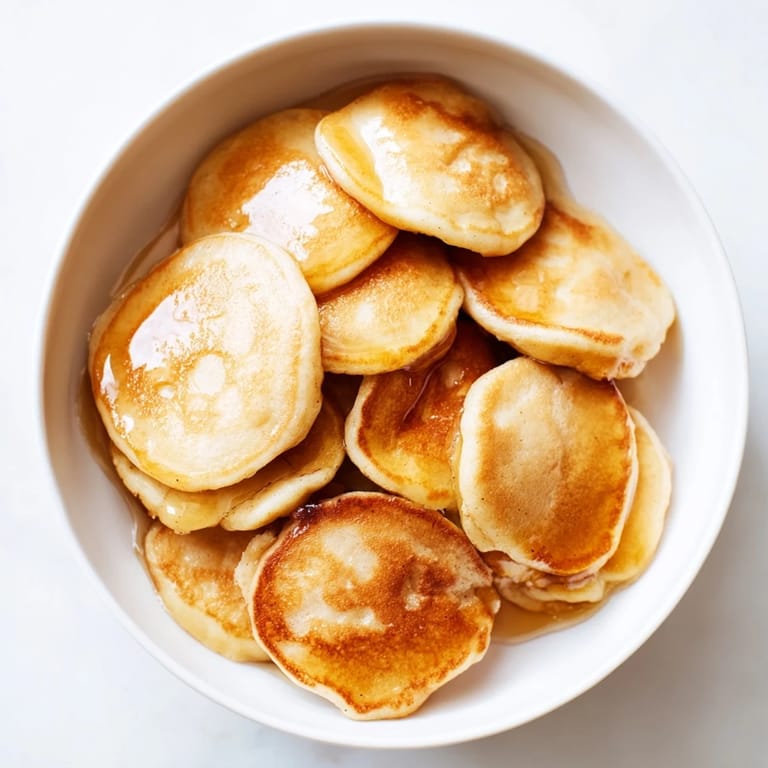 Pin it
 These little pancakes turned what used to be a rushed breakfast routine into something people actually ask me to make. They're proof that the best recipes aren't always the most complicated ones.
Recipe FAQs
- → What makes these pancakes fluffy?
The combination of baking powder, baking soda, and buttermilk helps create a light and airy texture in the mini pancakes.
- → How do I cook the mini pancakes evenly?
Using a squeeze bottle or piping bag to portion the batter ensures consistent size and even cooking on a lightly greased skillet.
- → Can I substitute buttermilk in this dish?
Yes, whole milk mixed with a teaspoon of lemon juice can be used as a buttermilk substitute to maintain tenderness.
- → What are good toppings for serving?
Drizzling maple syrup and adding cold milk replicates a cereal-style presentation. Honey or fruit compotes also offer delicious alternatives.
- → Are there any allergy considerations?
This dish contains wheat, eggs, and dairy. Appropriate substitutes should be used for those with allergies or dietary restrictions.