Pin it
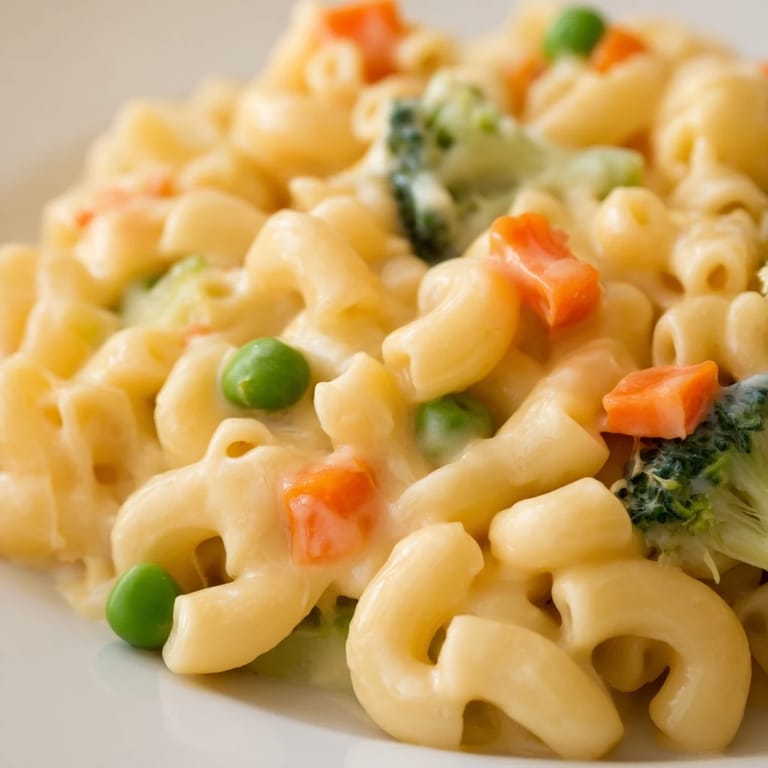
 The first time I made this mac and cheese, my skeptical brother-in-law took three servings and asked for the recipe before he even left the table. Something about the sweetness of carrots and peas cutting through all that rich cheese sauce makes it feel somehow lighter while still being completely indulgent.
Last winter when my youngest came down with a terrible cold, this was the only thing she would eat for three days straight. I must have made it five times that week, and now it is become our official comfort food for everything from bad days to birthday dinners.
Ingredients
- 300 g (10 oz) elbow macaroni: The curves catch the cheese sauce perfectly and I always cook it slightly less than the package says since it will continue cooking in the oven
- 1 cup broccoli florets: Chop them quite small so they soften nicely in the boiling water and do not stand out too much
- 1 cup carrots, diced: These need to be cut into small pieces so they cook through in just those few boiling minutes
- 1 cup frozen peas: Add these at the very last second so they stay bright green and do not turn mushy
- 2 tbsp unsalted butter: This forms the base of your roux and gives the sauce its silky texture
- 2 tbsp all-purpose flour: Whisk this constantly with the butter to prevent any lumps from forming
- 2 cups whole milk: Warm it slightly before adding if you want to prevent the sauce from breaking
- 1 cup sharp cheddar cheese, shredded: Buy blocks and grate it yourself since pre-shredded cheese has anti-caking agents that make sauce grainy
- 1/2 cup mozzarella cheese, shredded: This adds that incredible stretch factor we all love
- 1/4 cup Parmesan cheese, grated: The salty depth here balances out the milder mozzarella beautifully
- 1/2 tsp mustard powder: My grandmother insisted on this trick and she was right about everything
- 1/4 tsp garlic powder: Use powder instead of fresh garlic so it does not burn or leave harsh chunks
- Salt and black pepper, to taste: Season the sauce generously since the pasta absorbs a lot of flavor
- 1/2 cup panko breadcrumbs: These stay crunchier longer than regular breadcrumbs
- 1 tbsp melted butter: Toss this with the panko so they turn golden brown in the oven
Tired of Takeout? 🥡
Get 10 meals you can make faster than delivery arrives. Seriously.
One email. No spam. Unsubscribe anytime.
Instructions
- Get your oven ready:
- Preheat oven to 180°C (350°F) and lightly grease a 2-liter baking dish with butter or cooking spray
- Cook the pasta and vegetables:
- Bring a large pot of salted water to a boil and cook macaroni for 1 minute less than package directions, adding broccoli and carrots in the last 3 minutes and peas in the final minute before draining well
- Make the roux:
- In a medium saucepan over medium heat, melt butter and whisk in flour, cooking for 1 minute while stirring constantly until it smells nutty
- Create the cheese sauce:
- Gradually whisk in milk, stirring constantly for about 4 to 5 minutes until smooth and slightly thickened, then remove from heat
- Add the cheese:
- Stir in cheddar, mozzarella, Parmesan, mustard powder, garlic powder, salt, and pepper until all cheese is melted and the sauce is velvety smooth
- Combine everything:
- Mix the drained pasta and vegetables with the cheese sauce until every piece is coated, then transfer to your prepared baking dish
- Add the topping:
- If you want that crunchy layer, mix panko with melted butter and sprinkle evenly over the top
- Bake until golden:
- Bake for 20 to 25 minutes until bubbly around the edges and the topping is golden brown, then let it cool for about 5 minutes before serving
 Pin it
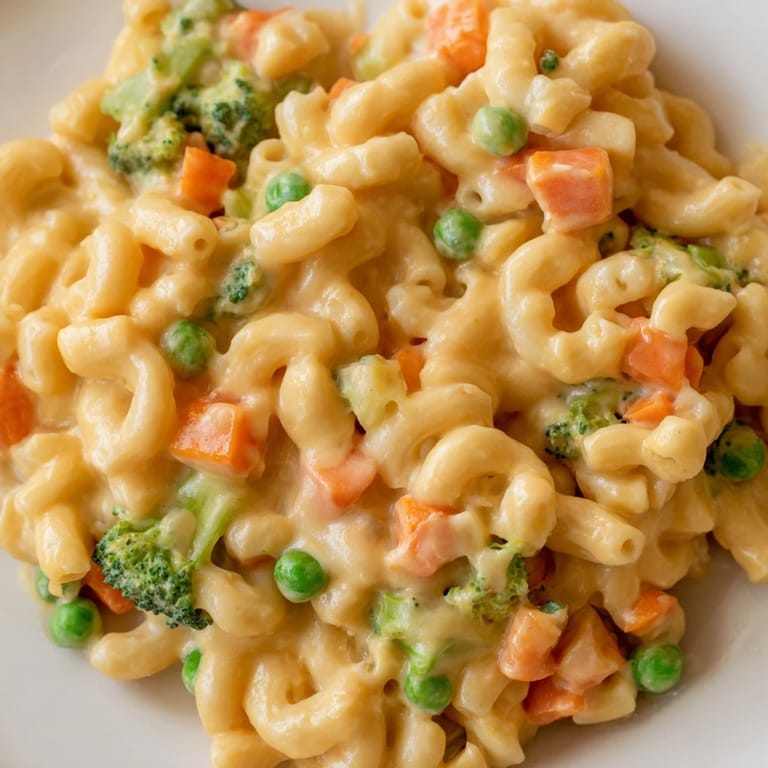
 My neighbor texted me at midnight once begging for this recipe after her daughter kept talking about the mac and cheese she had at our house. Now every time they come over, this is what her little one asks for before she even takes her coat off.
Make It Your Own
I have learned that this recipe is incredibly forgiving and welcomes whatever vegetables you have in your crisper drawer. Sometimes I add spinach or bell peppers, and once I even threw in some roasted butternut squash which was absolutely incredible.
Getting Ahead
You can assemble the entire dish up to a day ahead and keep it covered in the refrigerator. Just add about 10 extra minutes to the baking time if you are baking it cold from the fridge.
Serving Suggestions
This makes enough for four generous servings as a main dish, though in my house it usually only serves three because everyone goes back for seconds. A simple green salad with vinaigrette cuts through the richness perfectly.
- Try adding diced ham or bacon if you want to make it even more substantial
- Leftovers reheat surprisingly well in the microwave with a splash of milk
- The sauce base works beautifully for other pasta dishes too
 Pin it
 There is something so satisfying about watching everyone dig into a steaming bowl of this homemade mac and cheese, faces lighting up with that first bite. I hope this becomes a go-to comfort meal in your house too.
Recipe FAQs
- → Can I prepare this ahead of time?
Yes, you can assemble the dish up to 24 hours in advance. Cover and refrigerate, then bake directly from cold, adding 5-10 minutes to cooking time until heated through and bubbly.
- → What vegetables work best as substitutes?
Spinach, bell peppers, zucchini, cauliflower, and green beans are excellent alternatives. Add tender vegetables in the final cooking minutes to prevent mushiness, or sauté firmer vegetables separately before mixing with the sauce.
- → How do I achieve a creamy sauce without lumps?
Create a smooth roux by cooking butter and flour together before gradually whisking in cold milk while stirring constantly. This prevents lumps from forming. Keep heat at medium and whisk steadily for 4-5 minutes until the sauce thickens properly.
- → Is this dish suitable for freezing?
Absolutely. Cool completely before transferring to an airtight container. Freeze for up to 3 months. Thaw overnight in the refrigerator and bake at 180°C for 25-30 minutes until heated through, covering with foil to prevent over-browning.
- → How can I make this gluten-free?
Simply substitute all-purpose flour with a one-to-one gluten-free flour blend and use gluten-free elbow pasta. Ensure the panko breadcrumbs are certified gluten-free. The cooking method remains identical, and the flavor is completely unchanged.
- → What's the best way to prevent the top from burning?
Cover the baking dish with foil for the first 15 minutes of baking, then remove to allow the top to brown. If the edges brown too quickly, tent with foil while continuing to bake. This ensures even cooking throughout.