 Pin it
 My friend texted me a photo of her daughter in cap and gown, and all I could think was: these bars. There's something about graduation season that demands a dessert with personality—something that tastes like celebration but doesn't require you to stress in the kitchen. These cookie bars showed up at my first graduation party as a total impulse decision, and honestly, watching people grab a second one while catching up about life changes sold me completely.
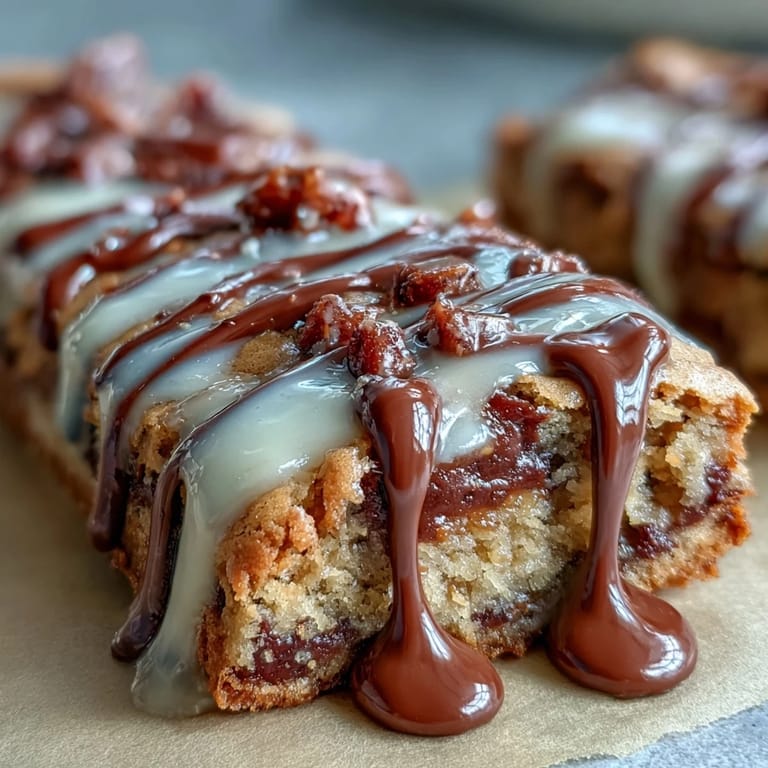
I'll never forget pulling these out of the oven for my nephew's graduation party—the kitchen smelled absolutely incredible, and three people followed their noses into the kitchen asking what I was making. By the time they cooled and I added the white chocolate drizzle, they'd become the first thing to disappear from the dessert table, even before the fancy cupcakes someone else brought.
Ingredients
- All-purpose flour: The foundation that keeps these bars chewy rather than cakey—don't sift it or you'll end up with something too dense.
- Baking soda: Just enough to give them a tiny lift and help with browning; skip it and they'll feel heavy.
- Salt: A pinch that makes every other flavor sing without tasting salty itself.
- Unsalted butter: Melted and cooled slightly so it doesn't cook the eggs when you mix it in; cold butter won't combine properly either.
- Brown sugar and granulated sugar: The combination creates depth—brown sugar adds moisture and molasses notes, while granulated sugar keeps them from being dense.
- Eggs and vanilla: Eggs bind everything and add richness; vanilla just makes people wonder what your secret is.
- Semi-sweet chocolate chips: The workhorse ingredient that keeps these from being just butter cookies; don't skip or substitute with something too dark.
- Colored candy-coated chocolates: These are where the magic happens for school colors—they add joy, crunch, and visual celebration.
- White chocolate for drizzle: A touch of vegetable oil keeps it flowing smoothly without seizing; this is the difference between elegant and messy.
Tired of Takeout? 🥡
Get 10 meals you can make faster than delivery arrives. Seriously.
One email. No spam. Unsubscribe anytime.
Instructions
- Prep your pan like you mean it:
- Line that 9x13-inch pan with parchment paper, leaving overhang on two sides so you can lift the whole batch out later. Trust me, trying to cut bars stuck to the pan is miserable.
- Combine your dry ingredients first:
- Whisk flour, baking soda, and salt in a medium bowl and set it aside—this prevents lumps and ensures the baking soda gets distributed evenly throughout.
- Build your wet base:
- In a large bowl, whisk the melted butter with both sugars until it looks smooth and combined. Add eggs and vanilla, whisking until you have something that looks creamy and slightly thick.
- Fold gently, don't beat:
- Gradually fold in the dry ingredients with a spatula, stirring just until you don't see flour streaks anymore. Overmixing develops gluten and makes them tough.
- Stir in the good stuff:
- Add chocolate chips and colored candies, folding them in so they're distributed throughout but not crushed.
- Spread and level:
- Pour the dough into your prepared pan and use a spatula to spread it into an even layer—this ensures consistent baking and cutting.
- Bake until barely underdone:
- Bake for 23 to 25 minutes; you're looking for golden edges but the center should still feel slightly soft when you touch it. A toothpick should come out mostly clean with a few crumbs clinging to it.
- Cool completely before decorating:
- Let the bars cool in the pan on a wire rack, then move them to the counter—rushing this step means your white chocolate drizzle melts into puddles.
- Melt white chocolate like it's delicate:
- Chop or use chips, then melt with vegetable oil in 20-second microwave bursts, stirring between each one so it doesn't seize. This slow approach prevents graininess.
- Drizzle with confidence:
- Use a spoon or piping bag to create those elegant lines everyone loves. Add sprinkles immediately if using them, while the chocolate is still sticky.
- Set and cut:
- Give the drizzle a few minutes to set before lifting the whole thing out and cutting into 16 squares with a sharp knife, wiping it between cuts for clean edges.
 Pin it
 There was this moment at a graduation open house where a mom asked for the recipe while her kid was already on their second bar, and something just clicked about how food marks these milestone moments. These bars became less about impressing people and more about showing up with something that tastes like you care, which is honestly the whole point of celebration food.
Making Them Your School Colors
The best part about these bars is how easily they transform into school spirit. Swap your colored candies for whatever colors matter—navy and gold, red and white, whatever your school rocks. The base recipe stays exactly the same, so you're just changing the appearance to match the moment, and that small personal touch makes all the difference at a party.
Storage and Make-Ahead Strategy
These bars actually get better after a day or two because the flavors meld and they stay surprisingly chewy. Store them in an airtight container at room temperature for up to four days, or wrap them individually in plastic wrap if you're prepping for a party ahead of time. You can even bake them the day before and add the white chocolate drizzle the morning of, which honestly makes party prep so much less stressful.
Why These Bars Beat Traditional Cookies
Bars are the underrated hero of celebration baking because they're faster, easier to transport, and somehow feel more substantial than individual cookies. You're not standing there scooping and baking batch after batch—you mix one dough, spread it, bake it once, and you're done. Plus, cutting them into squares feels more intentional than grabbing cookies from a plate, which somehow makes people slow down and actually enjoy them.
- One pan means less cleanup, which matters when you're juggling party prep.
- They photograph beautifully with that white chocolate drizzle for anyone wanting to share the moment.
- Cutting them the size you want means you control portions instead of hoping for consistency.
 Pin it
 These bars are proof that some of the best celebration moments don't require complicated recipes or stress—just good ingredients, a little care, and something that brings people together. Make them, share them, watch people light up, and know you've done something worth doing.
Recipe FAQs
- → How do I prevent the bars from becoming too dry?
Ensure not to overbake; remove bars when edges are lightly golden and a toothpick shows just a few moist crumbs.
- → Can I use different types of chocolate chips?
Yes, substitute semi-sweet chocolate chips with dark or milk varieties to suit your preference.
- → What is the best way to melt white chocolate for the drizzle?
Melt white chocolate with a teaspoon of vegetable oil in short microwave increments, stirring frequently to achieve a smooth consistency.
- → How do I customize the bars for themed celebrations?
Add colored candy-coated chocolates and sprinkles matching event colors for a festive touch.
- → How should the bars be stored after baking?
Keep bars in an airtight container at room temperature for up to four days to maintain freshness.