 Pin it
 I stumbled onto these bars on a Tuesday morning when I was frantically packing my gym bag and realized I'd forgotten snacks again. Instead of hitting the vending machine for the hundredth time, I raided my pantry and found ripe bananas, peanut butter, and oats staring back at me. Twenty minutes later, I had something that tasted like a healthier version of those childhood peanut butter cookies my grandmother made—except I could actually feel good about eating them. Now they're my go-to when I need something that tastes indulgent but won't leave me crashed an hour later.
I brought a batch to my office once, and my coworker Sarah literally stopped mid-sentence mid-presentation to ask what I was eating. She grabbed one, took a bite, and I watched her eyes light up in that specific way that happens when someone expects protein powder flavor but gets actual deliciousness instead. That moment convinced me these needed to become a regular thing in my life.
Ingredients
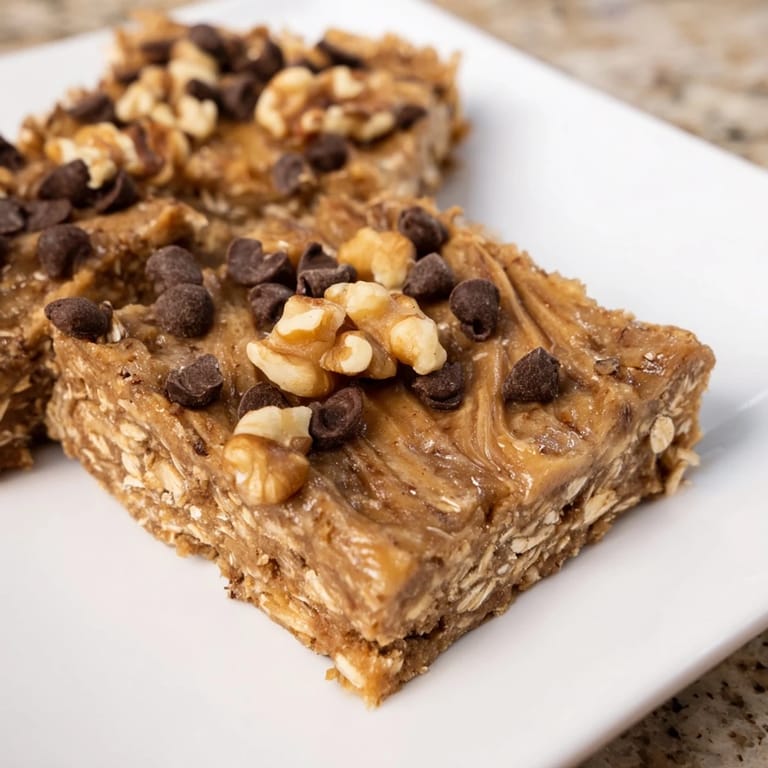
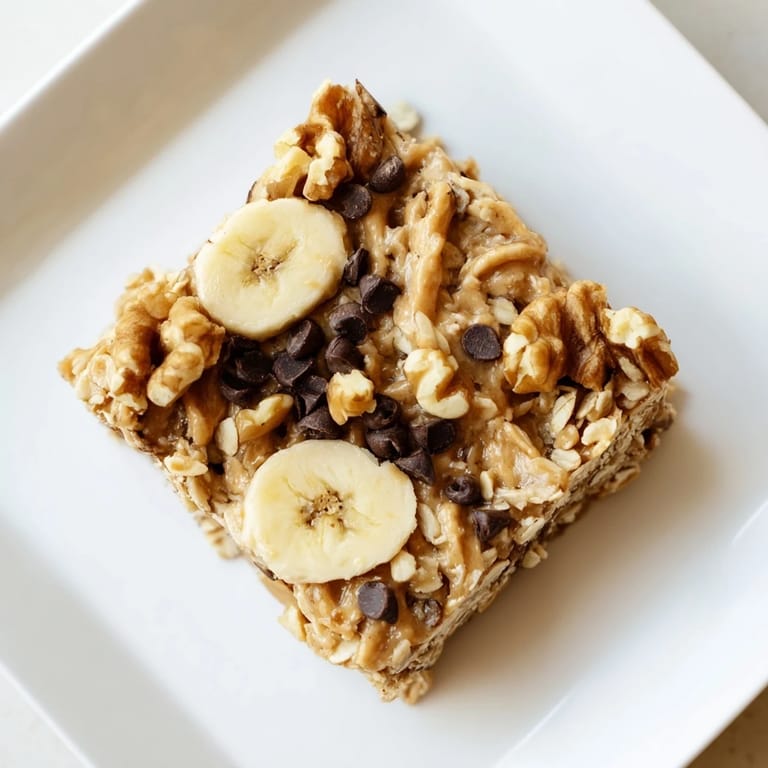
- 2 large ripe bananas, mashed: Use bananas that are almost past their prime—the brown spots mean more natural sweetness and moisture, which keeps your bars tender instead of crumbly.
- 1/2 cup creamy peanut butter: The creamy kind works best here because it mixes smoothly without fighting you; natural peanut butter works too if you don't mind a slightly grainier texture.
- 1/4 cup honey or maple syrup: Both work beautifully, though honey gives a subtle floral note while maple adds earthiness—pick whichever matches your mood.
- 1 tsp vanilla extract: This tiny amount does something magical; it rounds out the flavors and makes everything taste less one-dimensional.
- 2 cups old-fashioned rolled oats: These are the thick kind that you can actually see and feel, not the quick oats that turn everything into paste.
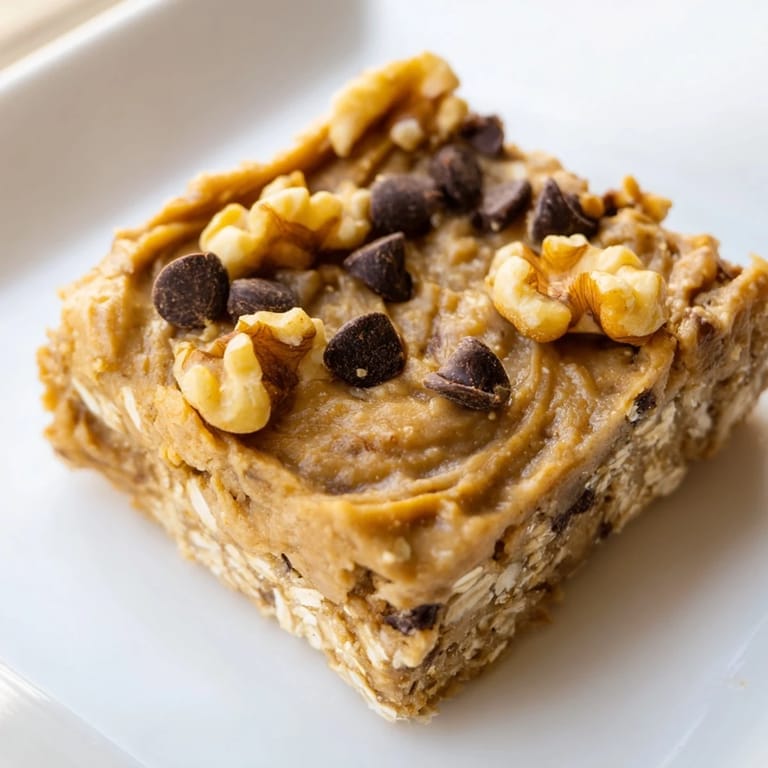
- 1/4 cup chopped walnuts or pecans (optional): I skip these most weeks, but when I add them, they provide a subtle crunch that changes the whole texture game.
- 1/4 cup mini chocolate chips (optional): These melt just slightly when pressed into the warm mixture, creating little pockets of richness throughout.
- 1/4 tsp salt and 1/2 tsp ground cinnamon: The salt amplifies every flavor, while cinnamon adds warmth and makes the whole thing feel less like a simple snack and more like something intentional.
Tired of Takeout? 🥡
Get 10 meals you can make faster than delivery arrives. Seriously.
One email. No spam. Unsubscribe anytime.
Instructions
- Line and prep your pan:
- Cover your 8x8-inch square pan with parchment paper, letting it drape over the sides—this becomes your escape handle later. It sounds fussy, but trust me, you'll be grateful when you're pulling these out instead of scraping them out.
- Mash your bananas:
- Break them down with a fork or masher until they're mostly smooth with just a few tiny lumps still visible. You want texture, not baby food, so don't overdo it.
- Combine wet ingredients:
- Stir the peanut butter, honey, and vanilla into your mashed bananas until everything is married together and looks like a thick, creamy base. This is where the bar actually comes together, so take your time and make sure there are no peanut butter streaks hiding in the bottom.
- Fold in dry ingredients and mix-ins:
- Add the oats, salt, cinnamon, and whatever optional add-ins you're feeling today—nuts, chocolate, whatever. Stir until every oat is coated and the mixture holds together when you squeeze it.
- Press into the pan:
- Transfer everything to your prepared pan and use the back of a spoon or spatula to press it down firmly and evenly. The pressure matters here—it helps everything bond together so your bars don't fall apart when you cut them.
- Chill and set:
- Pop it in the fridge for at least an hour, though I usually let mine chill while I do something else, which means I check on them around the 90-minute mark. When you press the top with your finger, it should feel firm, not squishy.
- Slice and store:
- Grab those parchment edges and lift the whole slab out in one satisfying motion. Use a sharp knife to cut it into 12 bars, wiping your knife between cuts if the mixture sticks to it.
 Pin it
 My favorite memory of these bars happened on a rainy Sunday when a friend stopped by unexpectedly, and I pulled a batch out of the fridge to go with tea. We ended up sitting on the kitchen counter talking for hours while slowly eating our way through half the batch, and she asked for the recipe before she even left. Now she makes them too, and sometimes we text each other photos of our latest batches like we're part of some secret snack club.
The Beauty of No-Bake Snacking
There's something deeply satisfying about making something nutritious without heating your kitchen or dirtying a dozen pans. On hot days when the last thing you want to do is turn on an oven, these bars remind you that wholesome food doesn't require complicated technique—just good ingredients and a little patience. I've found that the simplest recipes often become the ones you make over and over, not because they're flashy, but because they actually fit into real life.
Customize Without Overthinking
I've tested a hundred variations of these bars, and honestly, most of them work fine. Sunflower seed butter instead of peanut butter? Yes. Dried cranberries mixed with chocolate chips? Absolutely. A pinch of nutmeg alongside the cinnamon? Even better. The skeleton of the recipe is so forgiving that you can pivot based on what's in your pantry or what you're craving that particular week.
Making Them Your Own
The real magic happens when you stop following recipes exactly and start trusting your instincts. If you like things sweeter, add another tablespoon of honey. If you want more crunch, increase the nuts. If you're making these vegan, swap the honey for maple syrup and use dairy-free chocolate chips—the bars honestly taste just as good. These aren't precious; they're practical, which is exactly what makes them worth your time.
- Wrap individual bars in parchment and store them in the fridge for grab-and-go breakfasts that don't require thinking.
- If your kitchen runs warm, keep these in the freezer instead—they actually taste creamier when they're ice-cold.
- Make a double batch on Sunday and you'll have snacks waiting for you all week, which is the kind of small act of kindness you can give your future self.
 Pin it
 These bars sit somewhere between a snack and a small celebration—a moment when you remember that taking care of yourself doesn't have to be complicated or time-consuming. Keep a batch in your fridge, and I promise you'll reach for them more often than you expect.
Recipe FAQs
- → Can I use different nut butters?
Yes, almond or sunflower seed butter can replace peanut butter for varied flavor or allergies.
- → How do I make these bars vegan?
Swap honey with maple syrup and use dairy-free chocolate chips if including them.
- → What is the best way to store these bars?
Keep them in an airtight container in the refrigerator for up to one week.
- → Can I add other mix-ins to the bars?
Dried fruits like cranberries or raisins, as well as nuts and chocolate chips, can be added according to preference.
- → Are these bars suitable for on-the-go snacks?
Yes, their firm, portable nature makes them ideal for packed lunches and quick energy boosts.